Everything You Need To Know About Touch Up Pens
The Touch Up Pen FAQ
We here at TouchUpDirect love a good paint applicator. One of our absolute favorites is the touch up Pen. This DIY marvel will help you avoid the body shop and rid yourself of car coat damage with ease. We’re sure you still have questions so we’ve put together a little FAQ to answer all your burning questions about these handy car paint markers.
What is a Touch Up Pen?
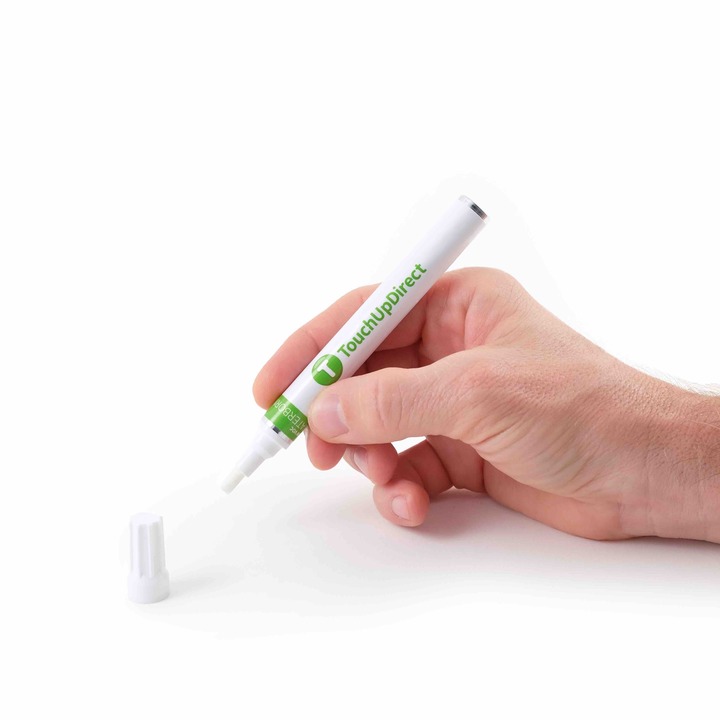
Touch up pens are car paint markers designed to fix up blemishes on your vehicle’s coat. The TouchUpDirect Pen applicator is designed with a chiseled nib that allows for greater control when you’re painting.
What’s the difference between a Pen and a Brush?
A Brush is used for slightly bigger scratches than the Pen as they release a more generous amount of paint. If your car’s coat has a rock chip or a pencil eraser sized scratch, use a car paint pen. If your car has chips or scratches that are the size of a quarter, use a Brush.
What’s the difference between a Pen and a Combo?
A Combo has both a Pen and a Brush applicator on each side so your vehicle will be ready for any scratches that befall it.
When Do I Need to Use a Touch Up Pen?
Touch up paint pens are usually used when your vehicle has sustained some minor damage to its coat. We measure it this way: is your scratch around the size of a pencil eraser? If the answer is yes, the touch up pen is the applicator for you.
How Do I Know if I Have the Correct Color?
This is actually an important question. Even the slightest mismatch between your new car paint and your body color paint can be noticeable. The best and fastest way to find your color is by finding its color code.
What is the Color Code?
A color code is a string of letters and numbers that identify exactly what color has been put on your vehicle. Even the most common of car colors can come in a variety of shades and going by name or sight could cause you to put the wrong paint on your car. For example, a 2021 Acura ILX has two gray colors: Lunar Silver Metallic and Modern Steel Metallic. The naked eye might not know the difference between Lunar Silver and Modern Steel but the manufacturer’s database knows the difference between NH-830M and NH-797M.
Where Do I Find This Code?
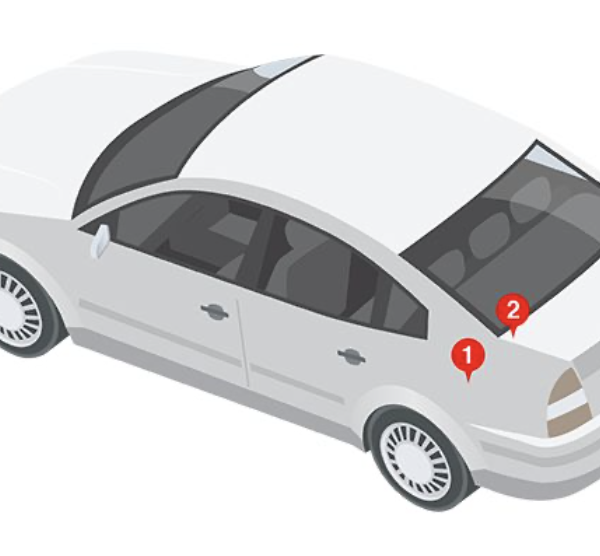
It depends on your vehicle. Many cars place the code on the inside of the door jamb. Sometimes it is towards the back of the car, under the spare trunk lid, the mat, the spare rear tire compartment, or trunk lid. Looking for an easier way than searching your car for a code? We’ve got your back. Go to TouchUpDirect’s website and simply enter to find your make and model in the dropdown menu to find your code.
How Much Paint is in a TouchUpDirect Touch Up Pen?
We fill our touch up car paint pens with 6ml of our high quality, low VOC touch up paint.
How is a Touch Up Pen Filled?
First, we pour the paint into the Pen container. Once the tube is filled, we add the Pen part of it (made up of mechanics, the chiseled nib tip, and the cap).
How Do You Prime the Pen?
Before you begin your touch up journey, you need to prime your car paint pen. When you take the cap off for the first time, you will see that the tip of the pen does not have any paint in it. Find a soft surface and press the pen tip down. Be firm but gentle. After 3 to 5 pumps, paint should flow into the pen tip.
So Primer Doesn’t Have Anything to Do With Priming the Pen?
No. Primer is the first step of the touch up process. Due to its binding abilities, putting down a coat of Primer will allow the paint to stick. It also provides a level or protection against corrosive elements and rust. If your damage is small but reveals metal or substrate, a Primer touch up pen is recommended.
How Do I Apply Primer, Colorcoat, & Clearcoat Using a Touch Up Pen?
First, you’ll want to clean your target area with soap and water so that there is no excess dirt. You’ll want a clean surface to work on. Next, make sure that you’ve primed your pen and shaken it well. Assess if you’ll need Primer. Don’t use Primer unless you can see bare metal, fiberglass, or plastic in the damaged area. Lightly dab the Primer pen on the damaged surface. Apply 2 to 3 even coats, waiting 15 minutes in between for each coat to dry. Once you’ve finished the final coat, give it 30 minutes before starting on the Colorcoat.
The Colorcoat is the layer that shows you the actual colors of cars. TouchUpDirect uses waterborne car paints, which give the colors a more deep and vibrant shade. Once your Primer is dry. Pick up your paint pen, shake well, and dab 2 to 3 coats on the touch up area, waiting 15 minutes in between coats.
The Clearcoat is next. The Clearcoat is a thin layer of plastic that offers both protection and a glossy sheen for your paint. Your color will not match the rest of the vehicle until the Clearcoat is applied. The method for Clearcoat application will sound very familiar. Dab 2-3 even coats on the area you are working on. Wait 15 minutes in between coats. Once you’ve finished, allow it to dry for 48 hours and you’ve officially touched up your car!
What is a Tricoat?
Some car colors are what we call Tricoats. Tricoats add an extra Colorcoat layer to give the paint a special Candy or Pearl effect. The process is almost identical to a non-Tricoat touch up application except that instead of a Colorcoat, you will receive 2 paint markers: a Basecoat and a Midcoat. The Basecoat goes on after the Primer. 2-3 coats dabbed on, with 15 minutes in between coats. Let the coat dry for 30 minutes before you apply the Midcoat, repeating what you did with the Basecoat step.
Make sure to check out TouchUpDirect’s store. In addition to our amazing paint pens, we have a variety of applicators that are absolutely essential for a good touch up.
If you’re someone who learns better from watching videos, we have a great guide on how to use paint pens to restore your car’s coat to the best results.
Our YouTube channel also has videos that cover a wide variety of topics. If you have other issues with your cars, trucks or motorcycles, we recommend that you check out our channel!
Our videos range from wheel touch ups to fixing mismatched paint to all kinds of instructions on your DIY projects.

 Cart
Cart
 Help Desk
